|
|
|
This help file is a work in progress and for now will help new users understand the operation of the base.
EVA
Rover
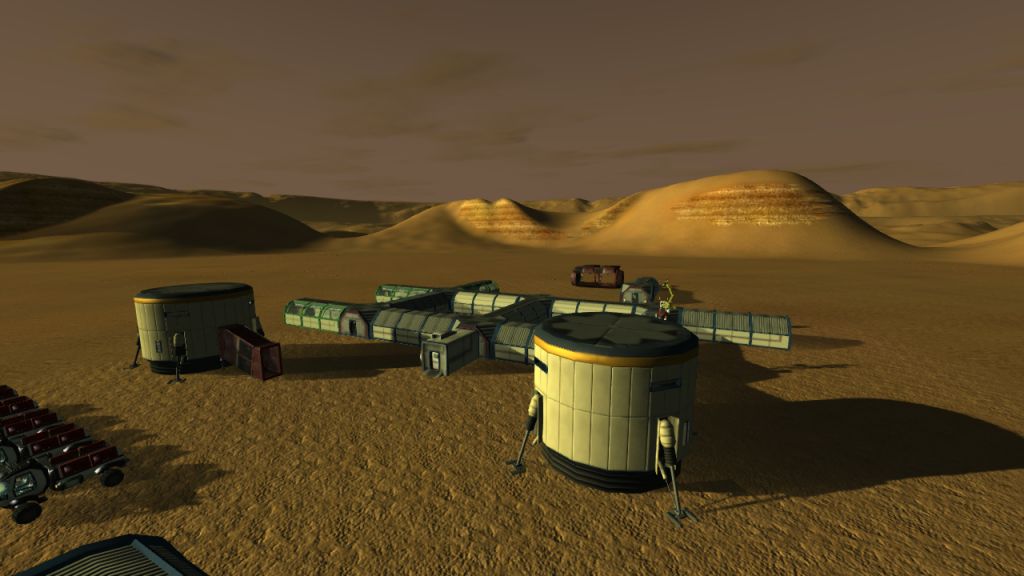
Your Base
Power Module
Life Support Module
Kitchen Module
Communication Module
Farm Hub and Greenhouse
Biology Hub and Module
Geology Module
Fabrication
Mineral List
NPC Guide
Equipment Service
Shuttle
Competition Gameplay
Multiplayer
Dedicated Server
The lower center PLAYER HUD will always be in view to show your current Health, Stamina, Food and Water status. Buttons in this dialog will pop up
PDA - (Personal Digital Assistant) - Will keep track of missions and messages.
Player - Information about your skills and bank.
Market - Current prices for ores.
MT - Mars day time and total run time for the game.
Story - Dialog to explain the current story progression.
Player Health, Stamina, Food and Water levels.
The RAD meter tells you how much radiation you have absorbed from being outside. Dont let the levels get into the yellow zone or you will take damage.

Your EVA Gear allows you to breathe the low oxygen atmosphere on Mars. There are two parts to the system: Internal atmosphere and External atmosphere.
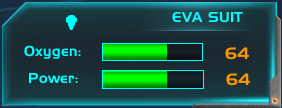
The right panel is your INTERNAL EVA information. There is a LIGHT switch to help you see in the dark. Turn the light off when not needed to conserve power.
This panel also shows your current OXYGEN and POWER levels. Make sure you have plenty of both OXYGEN and POWER before going on a mission.
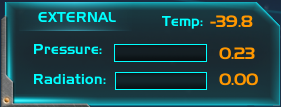
The left panel is your EXTERNAL EVA section tells you the external temperature, radiation level and pressure. Always check these levels
before you remove your EVA gear.
To recharge your EVA gear, find an EVA Charging station and select the Charge button
To remove your helmet and pack, find the EVALocker and select it with the mouse.
CHARGE 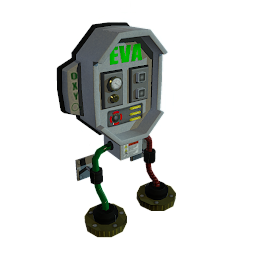 STORAGE
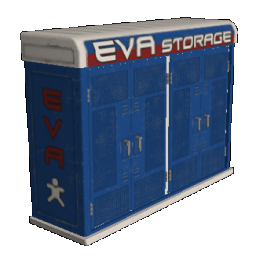
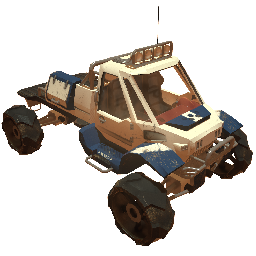 You can purchase a rover from NPC by the main garage.
To travel somewhere, select the rover with your mouse and choose drive. You can choose to ride if someone is traveling with you.
The main options will allow you to Drive, Ride, Repair, and Fuel. From this menu, you can also turn the Rover lights on or off, charge your EVA, and add or remove cargo.
You can purchase a rover from NPC by the main garage.
To travel somewhere, select the rover with your mouse and choose drive. You can choose to ride if someone is traveling with you.
The main options will allow you to Drive, Ride, Repair, and Fuel. From this menu, you can also turn the Rover lights on or off, charge your EVA, and add or remove cargo.
Fuel - You can Fuel by parking your rover inside the garage and select the Fuel button. The Fuel system
is fed by the Sabatier fuel generator inside the base. If you build a garage at your base be sure
the generator is running.
ROVER DIALOG 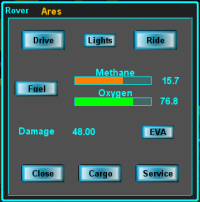
Cargo - To add cargo to your rover, select the cargo button. Your hand item now says LOAD. Click the button on the hand item and it will be moved to the cargo area if there is room. Large items, like the auger, need the truck right next to them them in order to be loaded.
The cargo area holds four items. To remove an item from the cargo select it from the cargo menu and the object will be moved to your hand slot if your hand is empty.
CARGO DIALOG 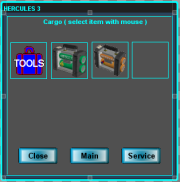
Repair - The rover will suffer some wear and damage as you use it. If your rover breaks down while you are out driving,
you can make a small repair using the on-board tools to get you back to base.
You can fully repair your rover by parking it in the garage to do your repairs.
EVA - You can recharge your EVA suit from the rover power and oxygen supply by selecting EVA in the rover menu.
Driving the Rover - Select the Drive button to get into the driver's seat.The Dash panel will pop up on
your display while you're driving. Select EXIT to leave te rover.
Steer the rover by holding down the right mouse button. Drive forward and back using W and S.
ROVER DRIVE DIALOG 
To use the Auto Cruise hit NUMLK. You can stop the cruise by hitting W.
You can change the rover view by pressing the TAB key to switch between first and third person view.
The Rover uses fuel cells and batteries for power. Be careful with the lights. If you leave them on too long, they will use all the power and you won't be able to start your rover.
Once you have reached a build site you will be prompted to CLAIM your base.
Once you enter a name for the base it will belong to you.
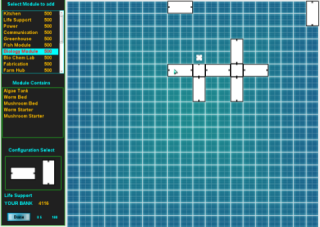
You may add modules on to your base by pressing CTRL B to bring up the build dialog.
Select a module type from the upper left panel. The contents of the selected module will appear
in the second panel. Next, select the orientation in the lower left panel.
MODULE TYPE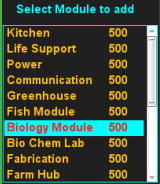 DESCRIPTION
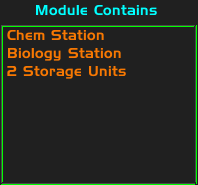 ORIENTATION
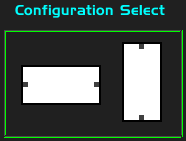
Move the mouse to the build screen and place it at the desired location. If the block turns green you may
build at that location. If the block is red you may not build at that location. Once a module is placed, it cannot be destroyed or moved.
A functional base begins with a POWER unit. Once your generator is online you can add a life support unit.
It is best to supply your new base with power as a first addition. Get the generator online then set up the Life Support Unit
Note you can only have one module each for power, life support, kitchen, ore process.
The first unit to set up is the power systems module.
In order to remove your EVA or set up life and farm systems, you will need to set up the air and pressure inside the base.
The Kitchen Module contains a freezer that you can stock with food that you grow or purchase.
Next to the freezer there is a food preparation area and microwave.
This module will provide various communications systems as well as weather monitors.
First thing is be sure the temperature is above freezing and the base pressure is above 13 psi. Low pressure and or freezing temperature will kill your plants.
Building a Biology Hub will provide you with the ability to raise fish.
Adding a Fish Module for raising fish and Biology Module will allow you to grow worms, mushrooms and algae. Each of these will become an integral part of your survival.
Once you have secured a base or joined a team you can buy mining equipment from the Mining NPC at Ares Base.
Player built parts will have more durability and will operate more efficient. You may choose
to mine the resources yourself or you can buy material from Phil Bond, the ore manager at the main base.
This is a list of minerals and the resources they produce.
Equipment will break down from time to time and you will have to repair or replace the internal parts.
Startup:
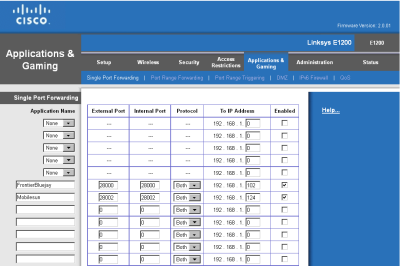
Multiplayer mode will require you to set your router ports to 28000. To access your router, open
a browser and go to 192.168.1.1 (check your router specs some may require a different address).
You will see a port setting or application and gaming button. Open the port selection dialog to access
the port settings. Your external IP address will be different than the internal settings so you have to
find out which address your computer is set for. The example below shows I have 2 computers set.
192.168.1.102 is the one I use most often. Set the port and enable it and save. Now you can run the
game with "Multiplayer" checked.
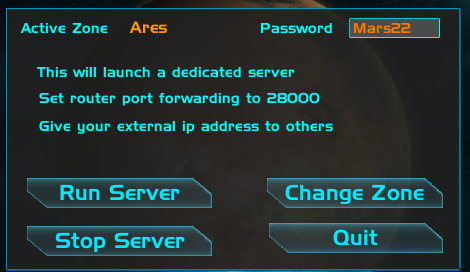
In the root directory of the game you will find FrontierDedicated.exe. After you set the port forwarding,
run this executable to reset missions, set passwords and launch the dedicated server using the
Run Server button. This will launch a console app to execute the server code.
To shut down the server run the program a second time and select the Stop Server button.
Do not use the X in the console window to stop the server or all the data will be lost.
This dialog will also allow you to reset or change game zones and set passwords.
Power Generator Select the RSG and power it on. Set the output slider to at least 50 to power the other units. The units that you add later may require more power but be warned that anything above 70 may cause damage that you have to repair.
GENERATOR 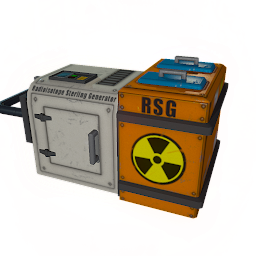 BATTERY
 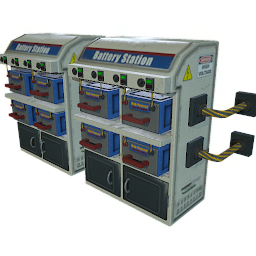 SOLAR CELL
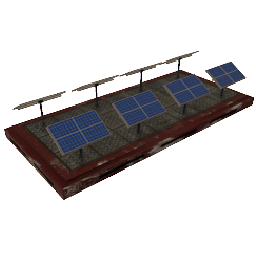
Battery - Make sure to check the battery level to make sure you have enough power to operate all your systems. You can adjust the generator
to compensate for extra power use or add a Solar array to supplement your system.
You can have more than one Solar array but take care not to over charge your batteries.
HEATER 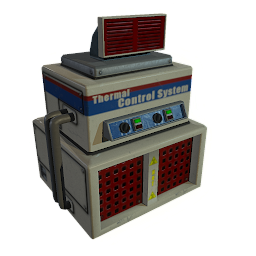
Heater Power up the heater unit and set the thermostat above 0 degrees.
Plants will not grow if the temperature in your base is below freezing. Anything above 10 degrees is good.
Life Support
PUMPS:
Start with the Water Pumps. Turn them on and set the output levels to 40%. The pumps supply water to the Separator water holding tank.
WATER PUMP 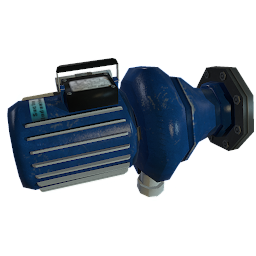
SEPARATOR:
This unit serves to provide drinking and farm water, oxygen for the Scrubber and hydrogen for the Sabatier Fuel Generator.
When the Separator water holding tank gets above 1 liter, turn the separator ON and set the drinking water output level to 0.1 This feeds your drinking water tank.
The Separator will remove water from the holding tank and convert it to oxygen and hydrogen. You want to adjust the Water Pump output to replace the water being removed
from the holding tank so the levels stay constant.
SEPARATOR 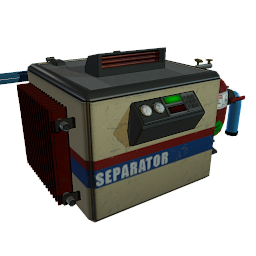
SCRUBBER:
Mars is about 4% inert gas (argon and nitrogen) and it is vital we get this gas to mix with oxygen to make a breathable atmosphere inside our base.
The next step will be to activate the Scrubber. Air from Mars surface will be drawn in to the scrubber, the inert gas is separated and pumped into our base.
Get the base air pressure above 10psi
SCRUBBER 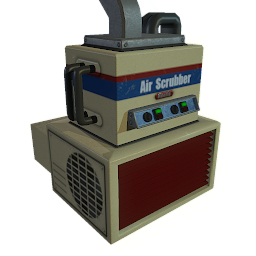
Mix 80% inert gas with 20% oxygen and we can survive without our EVA suits.
The Scrubber will take some time to replace all the atmosphere inside the base and pump it to 14 psi so be patient.
SABATIER:
The Sabatier fuel generator will make oxygen and methane for fuel for the rovers. Wait until you have 1 unit of hydrogen to start this machine. The fuel supply can be accessed
from a Garage Unit so you will need to add a Garage to your colony. This unit uses Hydrogen from the Separator along with a Nickel catalyst to generate Methane and dirty Oxygen for the fuel.
SABATIER 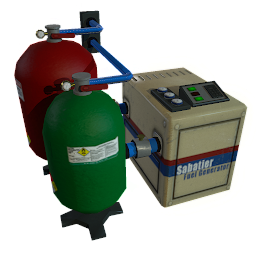
Check the equipment often! If you run low on battery power, systems and lights will shut down. Some of the equipment may wear out or become faulty over time. Watch the lights on the equipment as an indicator. Greeen lights mean things are running, Red lights show that things have stopped working.
Kitchen
FOOD PREP 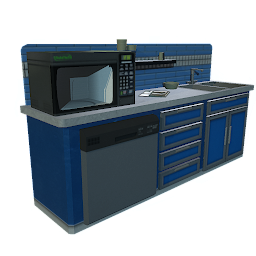 FOOD STORAGE
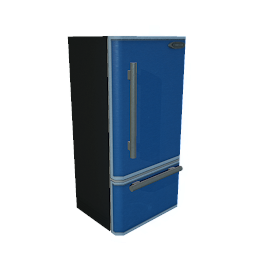
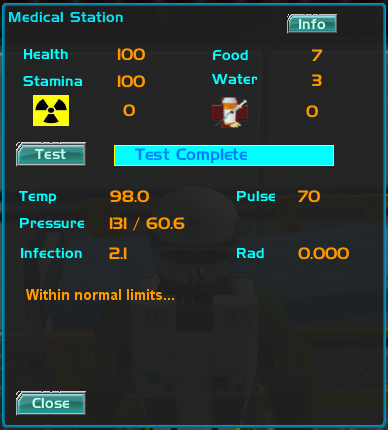
You will also find the Medical storage unit and diagnostic Bed. Store medicines you buy or make in the storage station. Use the Diagnostic bed to get current levels of health.
MEDICAL STORAGE 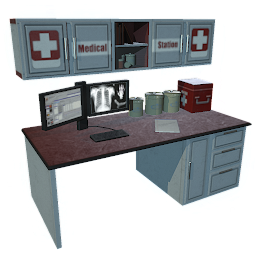 MEDICAL TESTING
To check your health click on the gurney. This will bring up a diagnostic dialog. Press the TEST button and wait
for the testing to complete. You will see all your health stats so you can make a decision on what if any medicine to take.
Propodine is for general use like cold and fatigue.
Dulacin is for sickness resulting from infections.
Radicium is for control of radiation exposure.
CAUTION Taking too much medicine is as bad as too little. Take the meds and give them a few minutes to work into your body before you take more.
After you eat or drink, you can use the toilet located in the Kitchen Module to relieve yourself. Make sure to do this regularly to stay healthy.
The waste collected here will be moved to the Composter found in the Farm Hub if you have one.
TOILET 
Communication
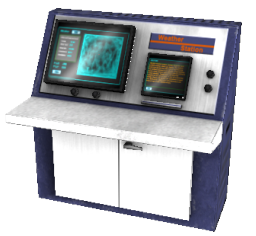
Geology Desk
This station will allow you access to the various maps and offers a SatScan for finding minerals.
 GEOLOGY
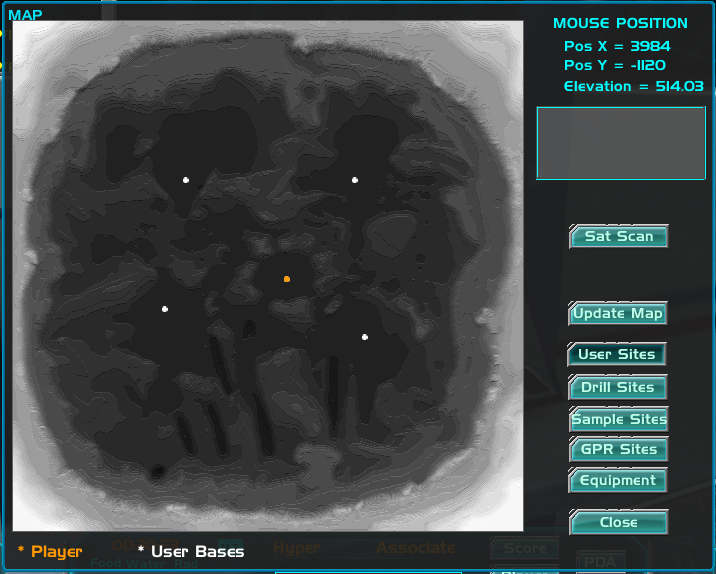
Weather Desk
The Weather Station will help you predict storms and atmospheric conditions in and around the base.
 WEATHER
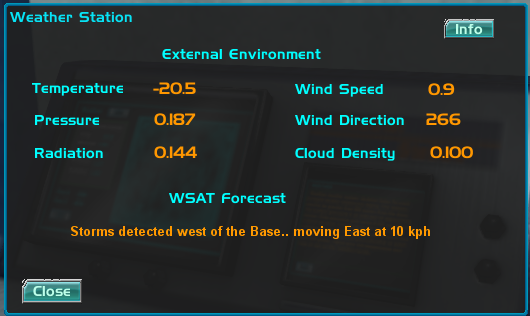
Communications Desk
The Communications station allows you to get information from Satellite relays from Earth as well as local communications.
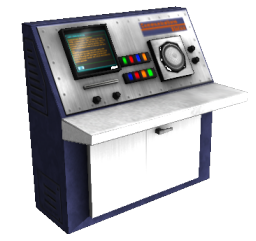 COMMUNICATIONS
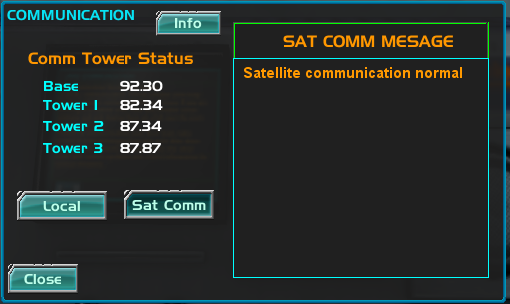
Farm
Farm HUB
The hub contains necessary elements for running the Farm Modules
Seeds are stored in the Seed Storage Unit. Seeds can be replaced by purchase from the Main Base
SEED STORE 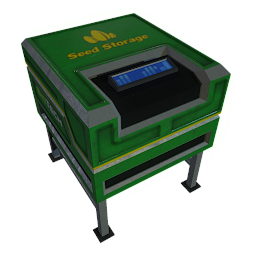
Process Plants
Once you pick a plant, take it to the processor in the farm hub. Process the plant to separate it into food, seed, and compost. The processor will store the seed and compost for you. You can either take the food to eat or store it in the freezer.
PROCESSOR 
Compost Unit
This unit will create organic fertilizer. The Separator filters will contain material as well as the bio waste container (be sure to use the toilet after eating and drinking).
When you process plants the waste from the plants, human bio waste, and filter waste will all combine to make organic fertilizer.
COMPOST 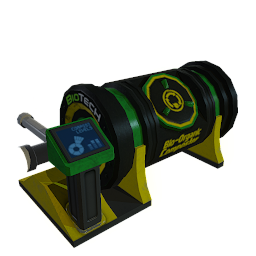
GREENHOUSE
Planters will grow 5 plants of the same type.
Open the planter dialog and add water. Add Seeds and Fertilizer found in the Farm Hub. Make sure to keep water and fertlizer inside of safe levels to avoid starving or drowning your plants.
PLANTER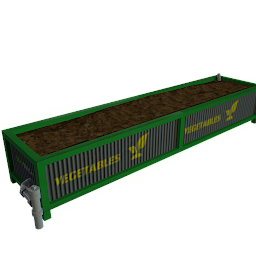
Harvest Plants
Keep the planter water and fertilizer between 0.25 and 0.75 to maintain proper growth.
Plants need to be at least age 40 to get good food value and return one seed. If you wait until your plant is over 60 you can get two seed but the food value will be lower.
Biology
Start fish tank growth
The fish tanks require a temperature above freezing. They have a heater system to help with this. Add fish to the tanks along with food and the fish will grow and provide you a source of food.
Get a set of fish eggs from the fish egg storage in the Biology Hub along with some fish food.
EGG STORAGE 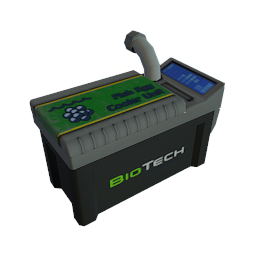 FISH FOOD
  FISH TANK
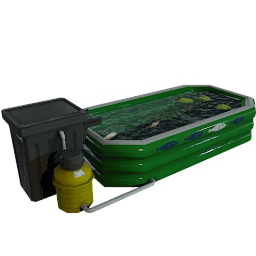
Setup Algae units
Algae tanks are provided so you can grow 4 different types of algae. Here is a list of algae types. Keep the growth density greater than 3 for best results.
Algae Reference:
Algae A will make food.
Algae B will make medicine.
Algae C will make fertilizer for plants.
Algae D will make certain plastics for parts you may need to make.
Algae N is the nutrient you need to add to promote growth.
Process the Algae in the BioChem Lab Unit to extract the type of material you want.
ALGAE TANK 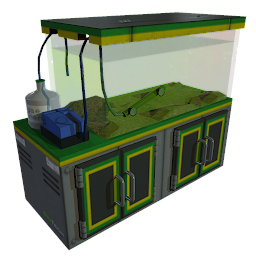
Start Wormbeds
The worm beds will provide protien for you to eat as well as a source of food. Try not to harvest all the worms or mushrooms. The lower the density the slower they will grow. Try to keep the growth density above 3.0 %
WORM BED 
Start Mushrooms
The mushroom beds will provide protien for you to eat as well as a source of food for your fish. Try not to harvest all the worms or mushrooms.
The lower the density the slower they will grow. Get the growth density above 3.0%
MUSHROOM BED 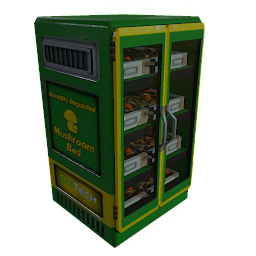
Bio processor
The Bio Processor in the Biology Hub can process Fish for food. You can either prepare, cook and eat the fish in the kitchen ares or take it to the freezer for storage.
FISH PROCESSOR 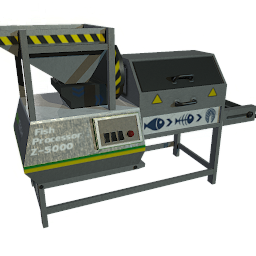
BioChem Module is a module you can add to your base. It will allow you to create Biologic and Chemical items for the base.
BIO STATION 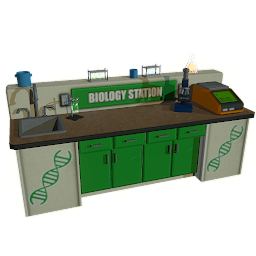 CHEM STATION
 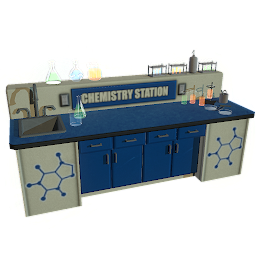 BIOCHEM STORAGE
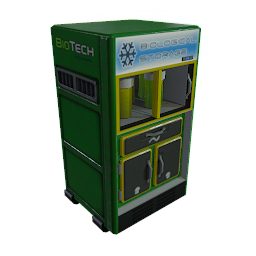
Biology Station
Food Bar 2 units of AlgaeA - Makes one bar of food.
Medicine AlgaeB and Iodine - Makes one unit of each type of medicine.
Nutrient Algae C and any protein based material like fish, fish eggs.
Chemistry Station
Plastic Algae D and either Bean or Potato plant. Makes parts for Fabrication.
Fertilizer 2 units of Algae C.
RESEARCH - Each of the stations have a Research button which will be used in current and future Story Mode versions of the game.
Geology
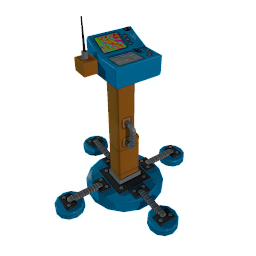
GPR Survey
 You can use the portable LIBS tester to track resources. Get a ground sample by pressing the G key while holding the sampler.
As you get closer to a resource the levels will go up. You can use the portable sampler to sample cores from the core drill as well but
you wont receive credits for the discovery. This device is only used to find high value resources.
You can use the portable LIBS tester to track resources. Get a ground sample by pressing the G key while holding the sampler.
As you get closer to a resource the levels will go up. You can use the portable sampler to sample cores from the core drill as well but
you wont receive credits for the discovery. This device is only used to find high value resources.
Once you have some high level readings, bring out the GPR unit. Be sure to load it with charges before firing. Fire the GPR and see if you get any resource echoes.

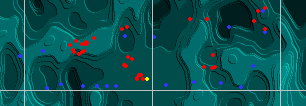
Here is a typical map view of the result of a GPR survey.
The blue dots indicate where the GPR unit fired a shot and the red dots
indicate the underground echo as a result. You can core drill these areas in red to get samples and later use the Auger to extract the material for processing.
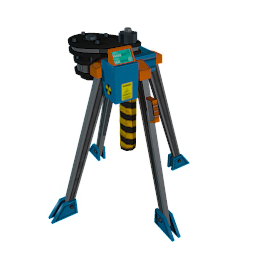
Use the Auger to extract minerals from the ground. You will need an ore box to empty the Auger material box. Set the Auger depth to about the same as the core sample you took earlier. Once it reaches that depth make sure it is extracting ore.
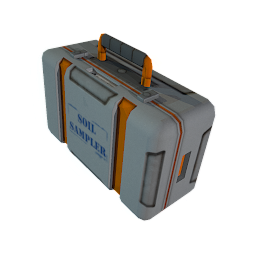
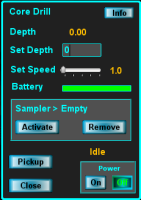
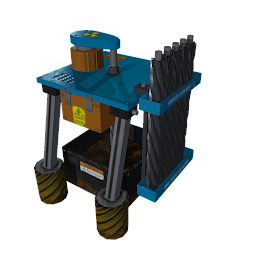
Core Drill
Once you find a resource, use the Core drill to obtain samples. Take these samples to the LIBS (Laser Induced Breakdown Spectrometer) in the Geology modules and test. This should provide you with accurate data on the type of mineral which lies below ground.
Hover over the red dots to get the depth and set the drill for that depth plus one meter. Once at that depth use the sampler to see if you hit a high density resource.
Take the sample and bring it to the surface by clicking on the RAISE button. Then remove the sample and take it to the LIBS tester at the base.
Augers
Take the Mining Auger out and start mining the material.
Ore from the Auger can be brought back to a Geology module (if you have one) and processed and the refined material stored in the bins beside the processor.
You will need some of this material inside the base in the fabrication area to help rebuild equipment that may be broken.
Augers have an auto sell Contract button that will pay you 25% of all ore collected by NPC.

Ore Box
 These can be purchased at the Main Base from the mining NPC. Use them to transport material from the augers. You may sell the material at Ares base or take it to
your base and process it. Each box holds 100 lbs of material.
These can be purchased at the Main Base from the mining NPC. Use them to transport material from the augers. You may sell the material at Ares base or take it to
your base and process it. Each box holds 100 lbs of material.
Fabrication
Repair Kits . . . . Materials Required
Heater Kit     	Copper Nickel Plastic
Pump Kit     	Copper Aluminum Plastic
Scrubber Kit    Calcium Lithium Plastic
Fuel Cell       Copper Iron Lead
Motor Kit       Aluminum Copper Iron
Generator Kit   Antimony Copper Iron
Sabatier Kit    Nickel Nickel Plastic
Separator Kit   Magnesium Nickel Aluminum
Algae kit       Titanium Plastic Plastic
Controller Kit  Copper Nickel Plastic
Battery Kit     Lithium Lithium Antimony
GPR Shots       Potassium Carbon Sulfur
NPK Fertilizer  Potassium Nitrogen Phosphor
Replacement Parts . . . Materials Required
Heater       PartsKit Aluminum Iron Tin
Pump         partskit, Aluminum, Magnesium, Plastic
Scrubber     PartsKit Carbon, Aluminum, Manganese
Fuel Cell    PartsKit Titanium, Bismuth, Sulfur
Motor        PartsKit Aluminum Iron Carbon
Generator    PartsKit Aluminum Iron Carbon
Sabatier     PartsKit Titanium Zinc Sulfur
Separator    PartsKit Carbon Copper Lead
Algae        PartsKit Copper Calcium Manganese
Controller   PartsKit Plastic Copper Lead
Explosive    GPRShots Fertilizer Battery Kit Iron
Fabrication Process
To build repair kits or parts you need the materials listed above. Go to the Fabrication Station and select the object you want to build.
Add the components and build.
You may store Fabrication materials in the storage units.
REPAIR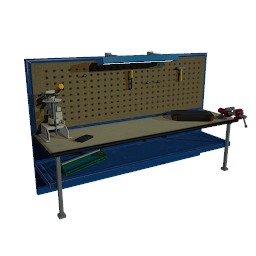 FABRICATE
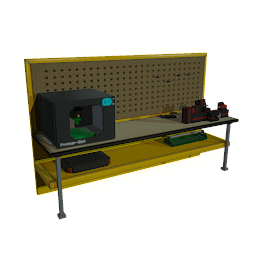 STORAGE
Mineral List
Alunite       contains Aluminum and Potassium
Apatite       contains Calcium and Phosphorus
Bornite       contains Copper and Sulfur
Braunite      contains Iron and Calcium
Cerussite     contains Lead and Carbon
Feldspar      contains Potassium  and Aluminum
Hematite      contains Iron and Sulfur
Ilmenite      contains Titanium  and Magnesium
jamesonite    contains Lead  and Antimony
Limestone     contains Nitrogen and Carbon
Magnetite     contains Iron and Titanium
Monazite      contains Thorium  and Helium
Niter         contains Nitrogen and Sodium
Olivine       contains Magnesium and Nickel
Phosphorite   contains Phosphorus and Calcium
Pyroxine      contains Aluminum and Lithium
Sphalerite    contains Zinc and Sulfur
Spodumene     contains Lithium and Aluminum
Stannite      contains Copper and Tin
Stibnite      contains Antimony and Sulfur
Tetrahedrite  contains Copper and Lead
NPC Guide
Mack Stanton  	Mission Manager  Located at the main airlock and will start you and may have missions for you.
Phil Bond   	Ore Manager Located south of the main base. He buys and sells ores.
Ellen Hays   	Mine Equipment Located south of the main base and supplies mine equipment.
Myamo Takka  	Organic Manager Located inside the main base in the kitchen area. Supplies food and medicine.
Boyd Adams  	Food Meds Located in the kitchen area at the main base.
Jean Adams  	Fab Manager Located inside the main base in the fabrication area.
Jesse Stone  	Garage Manager Located by the garage and the best used rover salesman we have.
Benjamin Carver Boss Man Located in the command center and is the boss of this base.
Sue Bond  	Farm Manager Located in the main base in the supply shack.
Zach Taylor  	Taxi Manager Located outside the main entrance. He will give you a ride for a price.
Equipment Service
First thing is to select the equipment and the SERVICE button. This will open a dialog so you can see the internal components.
EQUIPMENT 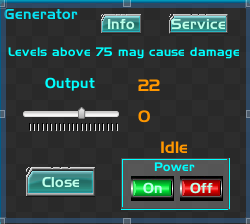 SERVICE
 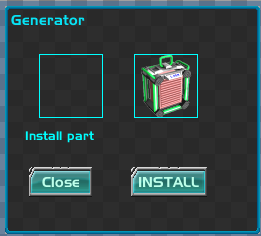 UNIT
UNIT 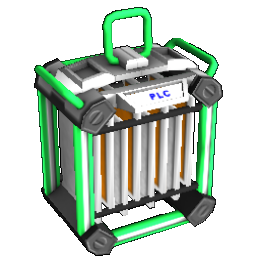
Each piece of equipment contains a PLC (Programmable Logic Controller) and a mechanical unit. Select the unit that needs to be repaired and choose the repair option.
You will see each of the parts inside the unit. Select the one that is broken and choose REMOVE.
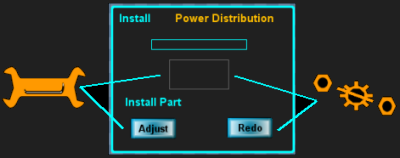
To install units into equipment, pick up a unit by selecting with the mouse. Go to the equipment and select it. You will get a dialog for that equipment. Select SERVICE and INSTALL.
The INSTALL / REMOVE dialog shows a progress meter. Sometimes the progress will be interrupted by the need to adjust the nut or connectors. A wrench will appear for you to make this adjustment.
If an open gear set appears, you forgot a washer or part and need to redo the install.
Shuttle
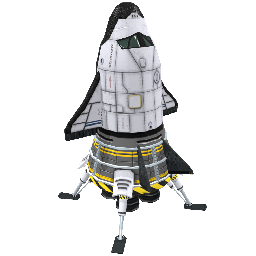 The Shuttle will launch from time to time to take passengers and cargo to the space station. Excess
ores will be removed from the base stockpile and will cause the market prices to change as a result.
The Shuttle will also be used for some Story Line tasks like emergency repairs or vital medicines that need sent
to the space station.
The Shuttle will launch from time to time to take passengers and cargo to the space station. Excess
ores will be removed from the base stockpile and will cause the market prices to change as a result.
The Shuttle will also be used for some Story Line tasks like emergency repairs or vital medicines that need sent
to the space station.
Competition Gameplay
Manage your money !!! Build what you can afford ....You will spawn out front of the Main Base.
Go inside and make the first right to the Command Center. Talk to Ben and collect your 5000 credit payment.
At this point you can explore the base check out the NPC's and see what they have to offer.
Leave the base and see the NPC by the garage. Buy a Rover.
Use the M key or open the main map and "update" to so you can see where there is an open base you can claim.
Drive out and claim the base. The claim dialog will only trigger when you are within the build area.
The first module to place will be a Power module since the rest of the base depends on power.
Second build a Life Support module.
Go inside and fire up the generator, set the heater to 10 deg, turn on the pumps and set flow to 0.37 is good.
Turn the separator on and set the water output to 0.1
Activate the Scrubber and you are all set.
Since it will take some time to build pressure in the base, go back to the Main base and buy some mine equipment.
Get a GPR, Extra GPR Shots, Core Drill and a couple of Ore Augers.
Go back to the area around your base and start locating ores with the GPR
Take core samples and drop the Augers.
Return to the Main Base and test your core samples ( you get credits for ore discovery )
Buy a couple ore boxes and head back to your base.
Check your life support gear to make sure things are running.
Go use the GPR on new areas, take core samples.
Before you head back to the Main Base to test the samples, empty the Augers into the ore boxes
At the Main Base, test the cores, sell the ores. Now you are making money
Making money with Biology
The first step is to add a Biology Hub. I usually put this in after the kitchen but anytime you can afford it will work.
The Biology hub will supply you with the ability to grow and harvest Fish.
Add a Fish Module, it comes with 2 grow tanks.
In the Biology Hub you will find a supply fish eggs and fish food.
Take one of each for each grow tank and add them to the tanks.
You will have 5 fish and enough food for them to survive.
Once the fish reach a growth level of 40 you can harvest and process them.
They will supply food and eggs for the next grow cycle.
If you let them grow to 60 you will get 2 eggs per fish which you can sell as well as the excess food.
Warning ... if the fish run out of food they will start eating each other so keep an eye on them.
The Biology Module
This module allows you to grow worms, mushrooms and 2 of 4 types of algae.
I find the best type of algae to start is plastics and fertilizer.
The plastic algae type you can use later on to make plastic for Engineering parts or just sell it.
With the fertilizer type you can make fertilizers for plants later on or nutrients for your algae tanks.
The Algae Tanks have a "Contract" button you can click most any time.
The "Contract" button allows the Main Base to buy your excess algae.
You make 5 credits per harvest but it happens quite often and will provide a steady income for you.
Add in a second Biology Module to get 2 more tanks and therefor more cash.
The Worm Beds and the Mushroom Beds will provide you with food and excess can be sold off to the Main base.
Port Forwarding
Dedicated Server