
|
|
|
This page is about the game. It is a work in progress and for now will help new users understand the operation of the base.
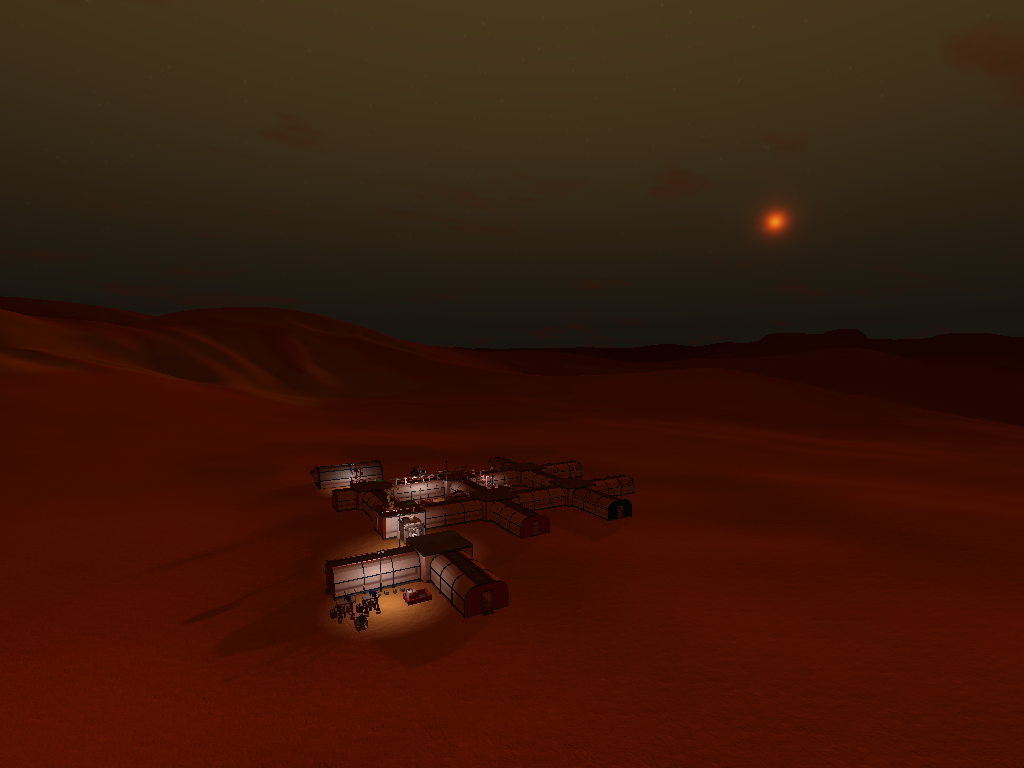
You are assigned the task of setting up a new base of operations on Mars. The main colony, Ares has sent out a construction crew to build the base in sections or phases.
There are 7 phases to the game and each time you complete the work orders you and your crew go back to Ares base while the construction crew sets up a new portion of the base.
The challenge in the game is to install the equipment and maintain the equipment. When you are done, at phase 7 you and your crew get replace by the habitation crew and
you can move on to set up the next base.
F1 key will bring up an in game help dialog to explain the key bindings and what is expected of you for each phase of the mission.
O key will bring up the work order dialog and explain what you need to do.
You will be scored on what you get done, the time it takes you and the condition of the base at the end of the phase.
Bad Things Happen
During your stay at the site, you may encounter various issues to deal with. Storms may come and go, radiation from the sun may get more intense, fires may break out
inside the base, sickness, radiation leaks and even a leak in the structure. These things can lead to some interesting challenges so be prepared.
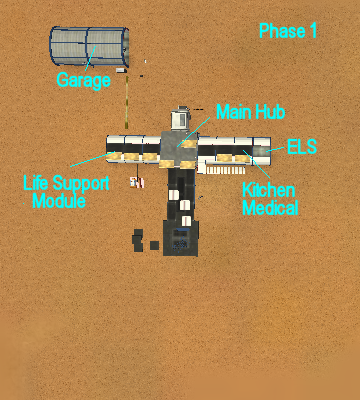
This equipment is supplied at phase 1 of the mission. You will have to enable this system before you progress.The parts to make all the equipment work is located out in the garage area. Pick the units up and carry them inside the base and install in the proper equipment. To install a piece of equipment, have it in your hand and target the object you want to install it into then left click the mouse. If your mouse can't target an object use the U key to access.
|
|
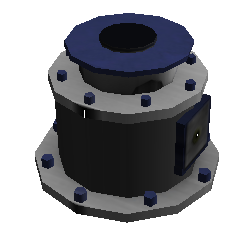
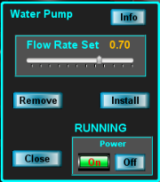
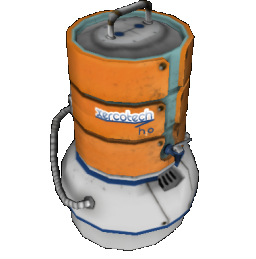
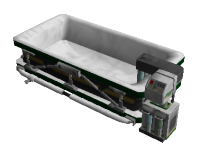
Water Pumps
The base is supplied with 2 pumps. At the start they are located outside in the garage area. Bring them inside the base and install them on one of the well heads.
Each pump has a heater and a power switch. The heater supplies heat down the well to the ice below. As a small quantity of ice melts, the pump pulls the melted water up to the separator.
If you run the heater at 100% it will burn up the pump, break an impeller or cause the pump to fail. It works best if you have both pumps running less than 100%.
A good rule of thumb is to access the separator and observe the watr input. While the separator is running, adjust both pumps to the lowest value to maintain an even level in the separator.
| Water Pump | Well Head | Pump Dialog |
|---|---|---|

|
|
|
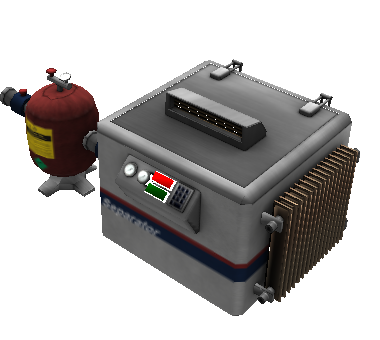
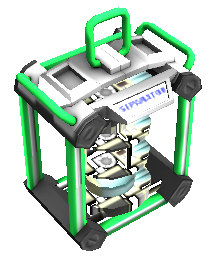
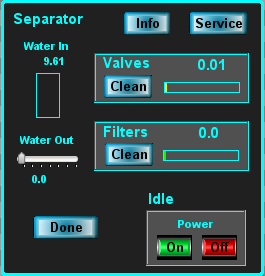
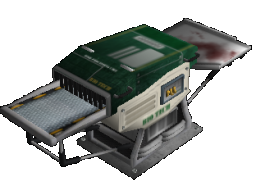
Water Separator
This unit takes water from the pumps and converts it to Oxygen and Hydrogen. The oxygen is stored in the main oxygen tank in the Life Support Unit. This oxygen tank will supply
the Air Scrubber. The hydrogen will be stored in the Sabatier Fuel Generator for further processing. The Water Separator has 4 internal components that you will have to install.
The components consist of a Valve, Separation Unit, Filter and Compressor. When the mission starts, these components will be found in the Garage module outside the base. Bring the units inside
and install them in the Separator.
| Separator | Equipment | Sep Dialog |
|---|---|---|
|
|
|
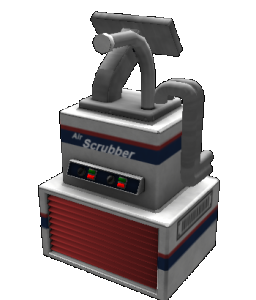
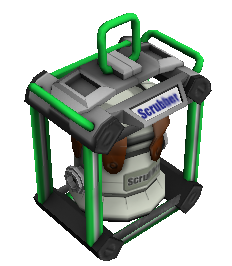
Air Scrubber
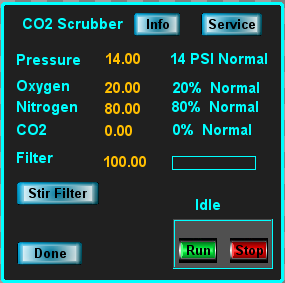
The air pressure on Mars is quite low. This Unit will collect atmosphere from outside, compress it and pressurize the interior of the base. The Scrubber will also remove Carbon Dioxide
from the air and replace it with a mixture of Oxygen and Nitrogen so we can breathe. The Mars atmosphere has about 3% to 4% inert gas so it will take some time to replace the CO2 with the proper air mixture.
This Unit requires 4 components to operate. A Valve, Scrubber Unit, Lithium Hydroxide Filter assembly and a Compressor. These components can be found in the garage area at the start.
When you activate the unit, the first thing it does is start to pressurize the base and extract inert gasses from the atmosphere. After a certain pressure is achieved, the Scrubber/Mixer starts to replace the
atmosphere inside the base. If you run the machine with no oxygen you will burn up the filters so beware to have a good supply of oxygen in the tank before you start.
| CO2 Scrubber | Equipment | Scrubber Dialog |
|---|---|---|
|
|
|
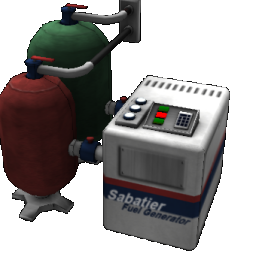
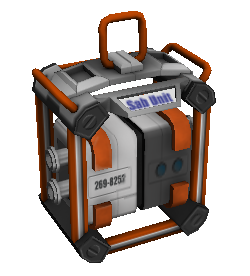
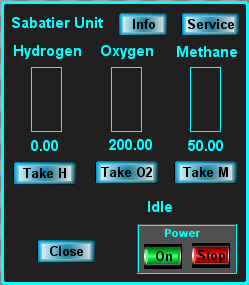
Sabatier Generator
This unit will supply oxygen and methane to operate Fuel Cells in the rovers. It works by using pressurized hydrogen with a catalyst and CO2 from the atmosphere to create the methane. The oxygen is a byproduct of the reaction after passing through a secondary stage. This unit requires 4 components to run. Valve, Catalyst, Sabatier Unit and a Compressor. All the components can be found out in the Garage area when the game starts.
| Sabatier | Equipment | Sabatier Dialog |
|---|---|---|
|
|
|
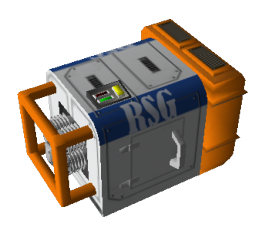
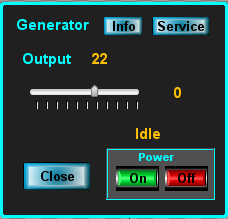
RadioIsotope Sterling Generator
There are 4 RSG (Radioisotope Stirling Generators) units. Each unit has a Heating Unit and a Linear Generator that must be installed before the unit will operate. Each unit supplies power to a battery. The base systems, lights, heaters etc are driven from these batteries. The RSG simply charges the battery. If you use more power from the battery than the RSG is supplying then you have to set the RSG power output up a bit. Setting the power output to maximum is a BAD thing. It will burn up the generator and more importantly the Heating Unit. The Heating Unit is made with radioactive material and when overheated may cause a radiation leak. Only set the power to the lowest value you need. Over 70% you take a chance of causing disaster.
| Generator | Equipment |
|---|---|
|
|
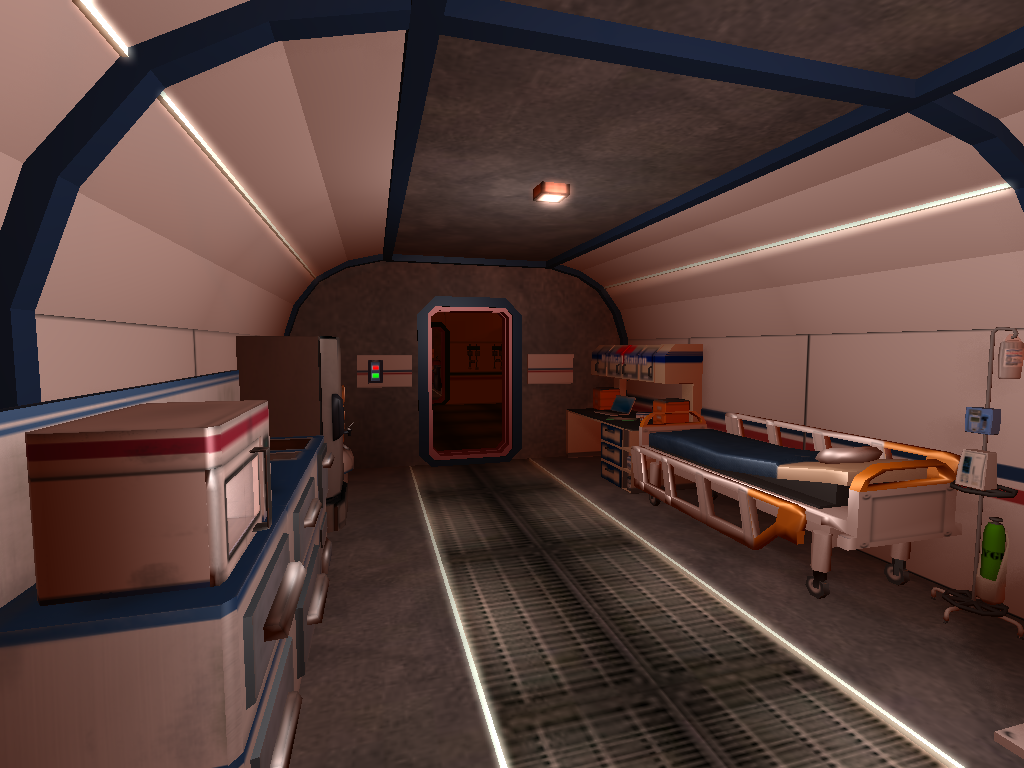
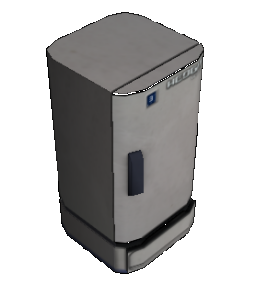
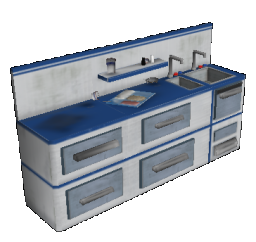
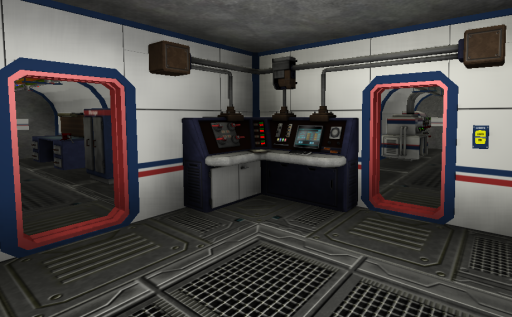
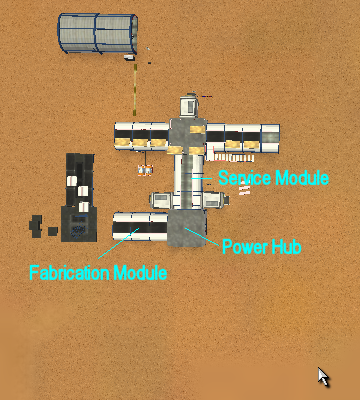
Support Module
This module is located on the eastern side of the Main Hub. It has a Medical area, food storage (and food prep in later phases) and a bathroom area. You will need to bring the food and medical
packs in from the garage area and store them in the proper areas.
| Water Tank | Freezer | Food Prep |
|---|---|---|
|
|
|
Install Dialog
When you want to install gear in one of the units, have the proper equipment in your hand, click the "Service" button and the install dialog will open. You will see the progress bar move as the action proceedes. If you see a wrench icon pop up in the center hit the "Adjust" button to adjust the current action like tightening a bolt. If the washer and bolts icon appears then hit the redo button because you forgot a part like a washer. If you dont hit the buttons in time then the process starts over. As your skill goes up this will happen less often.
| Service | Install |
|---|---|
|
|
|
This equipment is supplied during phase 2 of the mission. The construction crew has added a Power Hub and 2 connector modules to store the new equipment. You will be required to set up the Power Control center, the Heater and the second RSG unit.
|
|
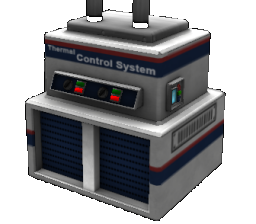
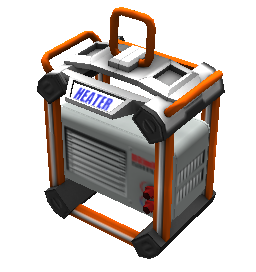
Heaters
The heaters get power from the battery rack located nearby. The heater requires a coil assembly to operate as well as power. Install the coil assembly and turn the power on. When starting up for the first time, set the temperature to just above freezing (0 c) to get the base stabilized. The base wont get any warmer any faster if you set the thermostat to max. If you do set the thermostat to maximum you stand a chance of burning up the coil assembly and or running the battery to zero power which will shut down other vital systems.
| Heater | Equipment |
|---|---|
|
|
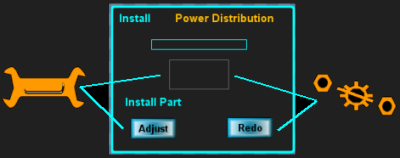
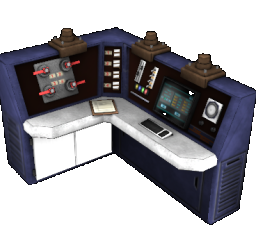
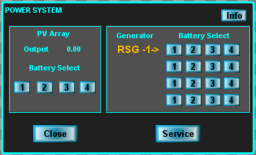
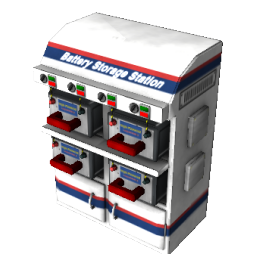
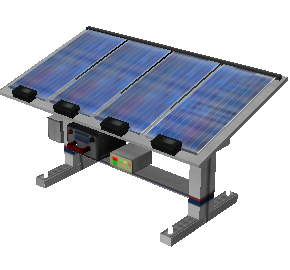
The power distribution
Thispanel will allow you to set up or change which battery the Photo Voltaic array will charge as well as which battery the RSG will charge.
Power Zones:
RSG 1 > Battery 1 = life support, main hub, kitchen
RSG 2 > Battery 2 = Power module, heater 1 and comm module
RSG 3 > Battery 3 = Farm, bio and heater 2
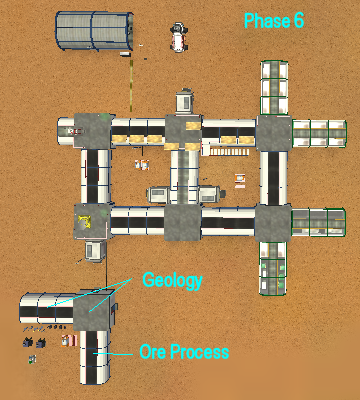
RSG 4 > Battery 4 = Geology modules
PV array can be switched to any battery at the Power Control Station
| Power Distribution | Power Dialog | Battery | Generator | Solar Array |
|---|---|---|---|---|
|
|
|
|
|
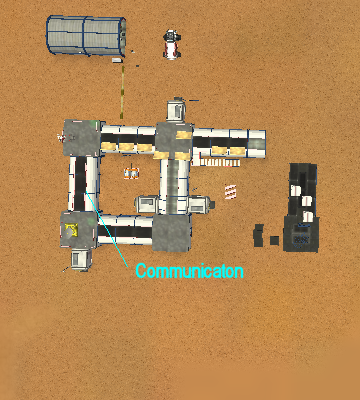
Phase 3 of the mission supplies you with a Communications Hub and 2 more support modules. You will need to power up the base Radio system and Satellite communications systems.

|
|
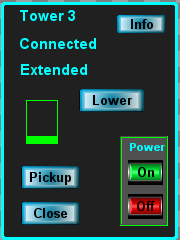
Radio Towers
Each zone will have 3 radio towers. They provide communication from the main colony Ares to all the outposts. Signals received from the input tower come from Ares and get relayed to our base.
The tower at the base pulls any messages out that would be intended for us then sends messages to the output tower and other outposts. Each tower requires a transmitter unit and a power system.
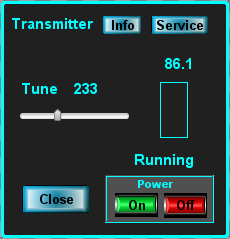
After you install both objects be sure to tune the transmitter to the proper frequency. Once the transmitter is powered up and tuned our base can start receiving messages.
| Tower | Equipment | Radio Dialog |
|---|---|---|

|
|
|
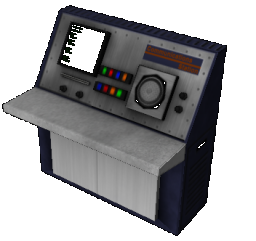
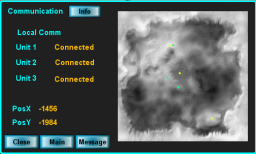
The messages we get will be information on some event or may be directives for a task to complete. You will get a chat message to let you know that there is a system message waiting at the communication console.
| Staiton | Dialog |
|---|---|
|
|
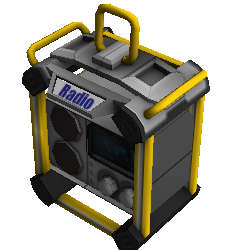
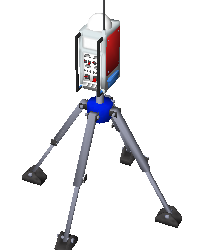
The Portable Transmitters
These units are supplied to help users working out in remote areas. You may be working far from the base behind a hill and your communications link may fail. Set up one of these portable
units so it can see the base and your work area. This transmitter acts as a relay point for data and messages from your location to the base and back.
| Staiton | Dialog |
|---|---|
|
|
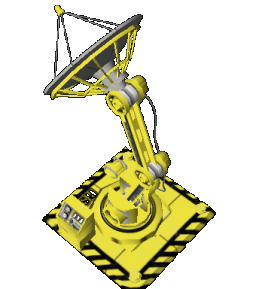
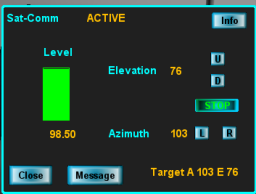
Satellite Dish
The Satellite Communications Dish (MSat) is a way to communicate with the satellites in orbit around the planet. These birds will relay messages from Earth, Houston Control center.
The orbiting satellites have mapping information as well as some weather events, radiation events and provide a backup for base to base communicaiton.
| Satellite | Dialog |
|---|---|
|
|
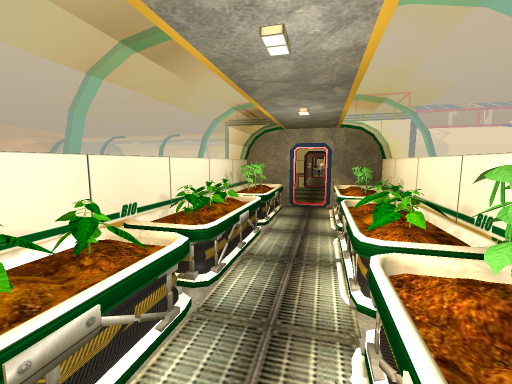
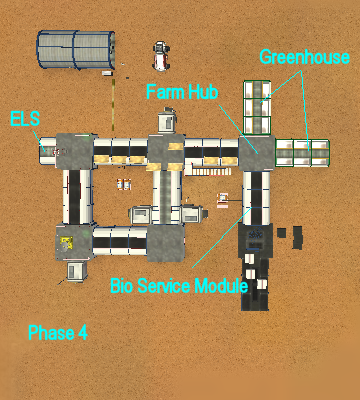
The Farm modules come in Phase 4 of the mission. There are 2 Greenhouses, a Hub and a Farm Power Module. Each of the Greenhouses has 6 planters. You must maintain the water
and fertilizer levels in the planters when growing food. The Farm Power Module has a battery to store energy generated by RSG - C located in the courtyard outside. This module also has the Farm Heater system to help you maintain
temperatures above freezing. Make sure you check the temperature often because freezing temperatures will kill your plants.
|
|
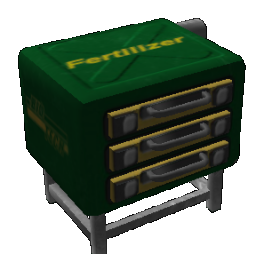
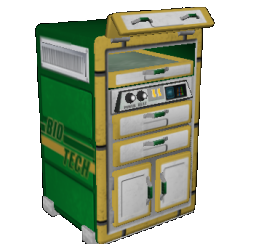
Fertilizer Storage
Plants can sometime require different types of chemical fertilizer. This unit will store 2 different types of chemical as NPK and organic you make in the composter. Types can be made from the composter or from the chemistry station from phase 5 and 6. Minerals harvested from phase 6 can be broken down into Phosphates, Nitrates and Potassium and stored in this unit.
| Fertilizer | Dialog |
|---|---|
|

|
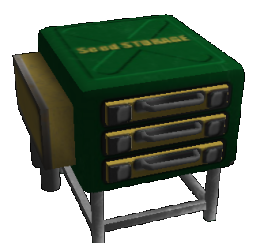
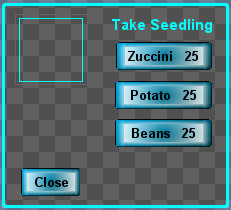
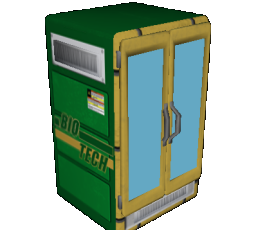
Seedling Storage
Mature plants will produce seed. The seeds are sprouted in this unit. Older plants produce more seed than younger plants and you will want to let some of the plants get older so you can produce more seed than you are using.
| Seedling | Dialog |
|---|---|
|
|
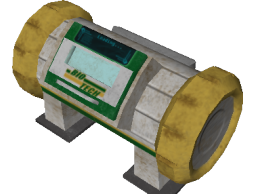
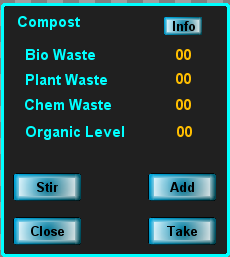
Compost Unit
This unit takes plant and fish waste, chemical and human waste and will create organic material for fertilizer over time. The ratio for mixing is 1 part plant material 0.25 waste matter and 0.125 chemical matter to create one unit of organic fertilizer.
| Composter | Dialog |
|---|---|
|
|
Planters
Keep the water and fertilizer levels between 0.25 and 0.75 for proper plant growth. There are 2 water cans in the Farm Hub which you can use to get water from
the tank in the Kitchen area. The fertilizer storage bin is located in the Farm Hub. Take seeds from the seed storage bin and plant 3 seedlings in each of the planters.
When the plants are mature enough, pull them up and take them to the Plant Processing Device located in the Farm Hub. This processor will strip the seeds and
stems from the plant and return raw plant material to you. Take this raw plant material to the Freezer in the Kitchen area and store it for later use.
| Planter | Processor |
|---|---|
|
|
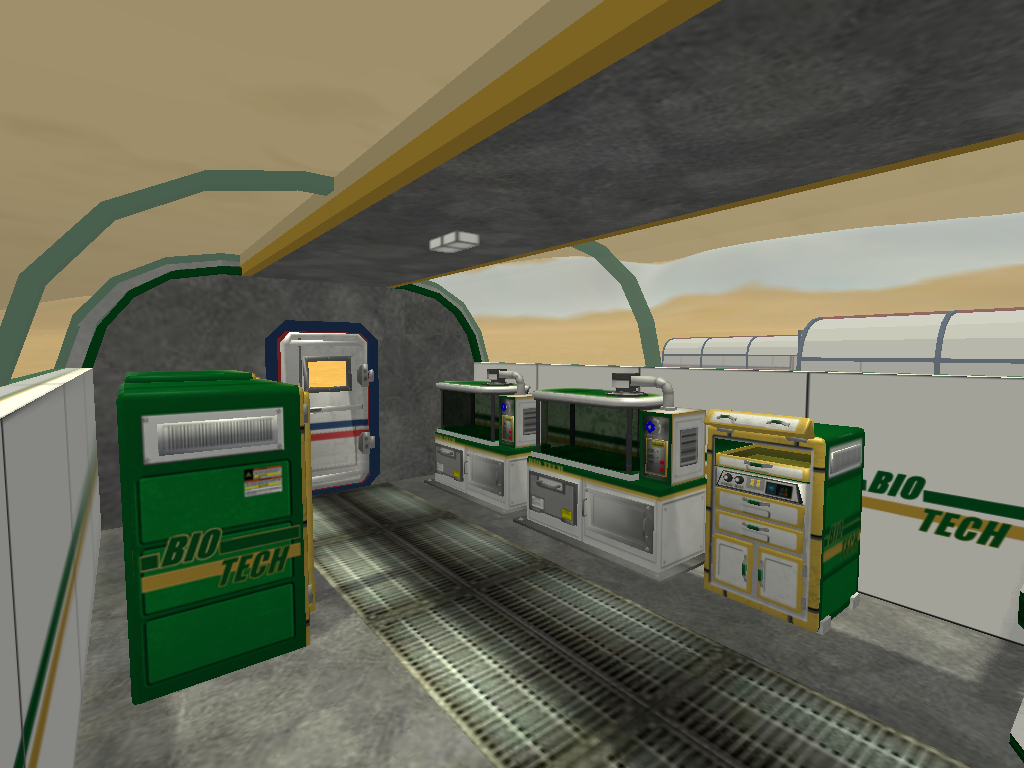
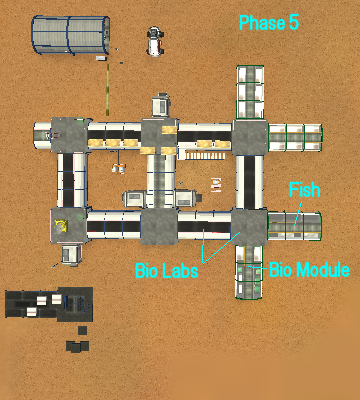
The Biology unit supplies organic material for food, medicine and plastics. It is crucial to maintain the proper temperature in this area. This phase supplies 2 biologic greenhouse units and a hub for processing the materials. You will need lots of water for this phase so be sure you have your water tank full. Power for this phase is supplied by battery 3 from the previous phase. Be sure to watch the power generation for this and the farm unit. Any failure here will result in a failed mission. The heating unit for phase 4 will supply heat for the farm and biology phases. Keep these areas above freezing. A temperature of 20 to 25 C will help promote growth.
|
|
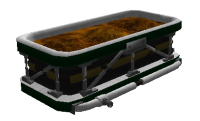
Fish Tanks
There are 2 fish tanks to allow 3 kinds of fish and one section of frogs. You have to set up the tanks with the proper fish types and maintain the temperature and food levels in the tank. Supplies are located in the Biology Hub. When the fish and frogs are fully grown you can process them in the biology hub to get more eggs, material for fertilizer and food.
| FishTanks | Processor |
|---|---|
|
|
Worm Beds
Worms will be essential for the colony as they will supply food for the inhabitants and food for the fish. Start the beds off, water them and let them grow. Remember the more dense the worm colony the faster they will produce so dont harvest them right away.
Mushroom Beds
Mushrooms are a good source of food.
| Starter Supply | Mushroom Bed | Worm Bed |
|---|---|---|
|
|
|
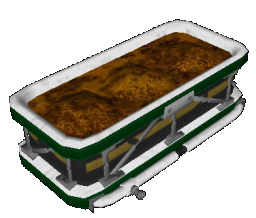
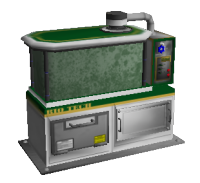
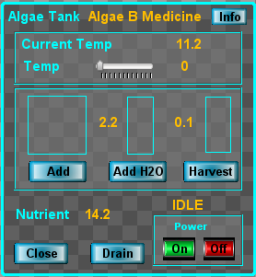
Algae Tanks
Algae can supply food, medicine and some plastic materials the base will need. Add water to the tanks, nutrients for growth and select which type of algae you think you might need. There is an algae supply cabinet next to the tanks so pick wisely. Algae growth requires water, nutrient and a algae starter.
Algae Reference:
Algae A will make food.
Algae B will make medicine.
Algae C will make fertilizer for plants.
Algae D will make certain plastics for parts you may need to make.
Algae N is the nutrient you need to add to promote growth.
| AlgaeTanks | Algae Supply | Dialog |
|---|---|---|
|
|
|
There are 20 resources under the ground for you to discover. They are randomly spread out across the zone. Each of the resources have a primary mineral content and a secondary mineral content. Some of the resources you may or may not need but the over all plan is to find out what is there. You must take ground samples, do echo locations and core sample the material to see what you have. When you decide which mineral to gather you can use the augers to obtain the material.
|
|
Mineral List
This is a list of minerals and the resources they produce.
Alunite.......contains Aluminum and Potassium
Apatite.......contains Calcium and Phosphorus
Bornite.......contains Copper and Sulfur
Braunite......contains Iron and Calcium
Cerussite.....contains Lead and Carbon
Feldspar......contains Potassium and Aluminum
Hematite......contains Iron and Sulfur
Ilmenite......contains Titanium and Magnesium
jamesonite....contains Lead and Antimony
Limestone.....contains Nitrogen and Carbon
Magnetite.....contains Iron and Titanium
Monazite......contains Thorium and Helium
Niter.........contains Nitrogen and Sodium
Olivine.......contains Magnesium and Nickel
Phosphorite...contains Phosphorus and Calcium
Pyroxine......contains Aluminum and Lithium
Sphalerite....contains Zinc and Sulfur
Spodumene.....contains Lithium and Aluminum
Stannite......contains Copper and Zinc
Stibnite......contains Antimony and Sulfur
Tetrahedrite..contains Copper and Lead
Soil Sampler
 This unit is a portable soil testing device. Go out into an area of interest and take a ground sample using the [G] key. With the Plibs device in your hand, right click on the
ground sample in your inventory. You will get a reading of some mineral. Travel some direction about 25 or so meters and take another sample. If the values of the second
sample are greater than the first then you are heading toward a deposit of material. When you move and sample and the value goes down then you can assume there is some mineral
deposit nearby. This would be a good area to start the GPR testing.
This unit is a portable soil testing device. Go out into an area of interest and take a ground sample using the [G] key. With the Plibs device in your hand, right click on the
ground sample in your inventory. You will get a reading of some mineral. Travel some direction about 25 or so meters and take another sample. If the values of the second
sample are greater than the first then you are heading toward a deposit of material. When you move and sample and the value goes down then you can assume there is some mineral
deposit nearby. This would be a good area to start the GPR testing.
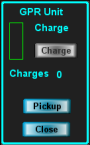
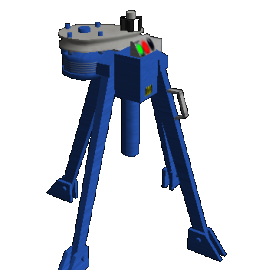
Ground Penetrating Radar
This unit is a seismic transmitter / receiver system. It will fire a seismic wave into the ground. If the wave hits an object of varying density it will reflect that wave back to the device.
The GPR unit will calculate the direction and depth from it's current position and mark the echo with a red dot on your map. The objects below ground have a size.
In order to determine the shape and size of this unknown object you will have to take another GPR reading at some distance on the other side of this first echo.
| GPR Unit | Dialog |
|---|---|
|
|
1. You are the yellow dot. You have fired the GPR and exposed
underground echoes (in red)
2. Move to the opposite side of the ground echo and fire
another GPR shot.
3. Now you see two ground echoes. That gives you an idea of
how wide the object under the ground is.
4. Move to a 90 degree angle from the two ground echoes and fire a
third shot.
5. Now that you have 3 echoes you can be sure of the object size. Use
the drill and punch a hole in the middle of the three ground echoes and
you will strike the object.
| Step One | Step Two | Step Three | Step Four | Step Five |
|---|---|---|---|---|

|

|

|

|

|
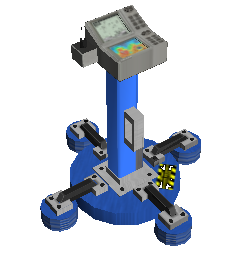
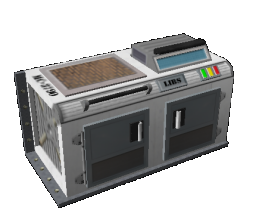
Core Sampler
This device will be used to drill down to an unknown deposit and take a sample. Once you have a sample you will know the depth below ground and if you take this sample to the
LIBS (Laser Induced Breakdown Spectrometer) at the main base and test it, you will know exactly what primary and secondary minerals you have found. You should use this information
to determine if this mineral will be something you can use in the colony. If you decide that the material is something you will need, the next step will be to
set up the Mining Auger and extract the minerals.
| Core Sampler | Dialog | LIBS Tester |
|---|---|---|
|

|
|
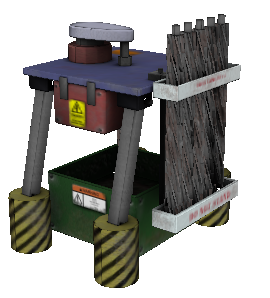
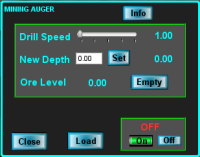
Mining Auger
After you determine where the mineral deposit is and the depth, bring the Auger out to the site and set up mining operations. Set the Auger depth to what you determined using the Core Sampler
and begin mining operations. The Auger will shut down when the storage box reaches 10 pounds of material. Bring the portable mineral transport boxes out to the site
and empty the Auger storage bin. Be sure to restart the machine before you leave. This material can now be taken to the Geology Labs at the main base and processed into useful material
for the colony.
| Auger | Dialog |
|---|---|
|
|
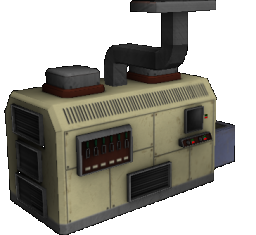
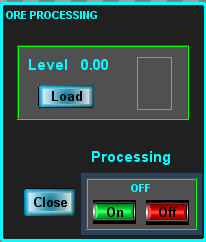
Ore Processor
Go out to the Augers with a container and remove the material from the Auger. Bring the material back to the processor and load it up. Start the processor and after a time
the material extracted will be placed in the Ore Storeage unit for later use.
| Ore Processor | Dialog |
|---|---|
|
|
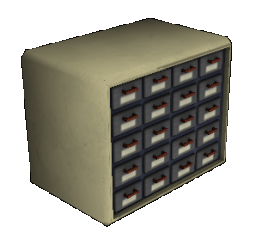
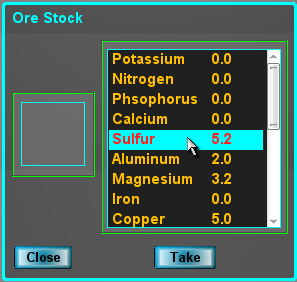
Ore Storage
The Ore Processore will separate the ore into it's chemical components and store the material in this unit. You can select an ore from the unit to take inside the base
and store in the Fabrication Storage Units for later use.
| Ore Storage | Dialog |
|---|---|
|
|
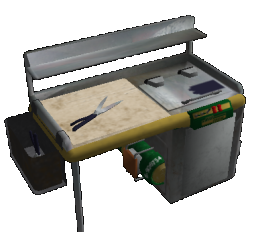
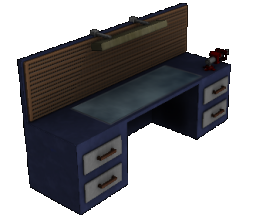
Fabrication
To manufacture repair kits, select the kit you want to build and note the material required. Place the proper material in the slots provided to build the kits.
The kits can be stored in the Fabrication Storage Units for later use.
| Fabrication Desk | Select Dialog | Build Dialog |
|---|---|---|
|

|

|
The final phase of the mission is to make sure the colony is self sufficient. The farm and biology labs have to produce more than they consume. The geology of the area
can produce enough raw materials to build parts that may fail. This phase will allow you to prepare the base for the habitation crew so you can move on and set up the next base.
The more resource discoveries, food, meds and spare parts you find or create the better your final score. This phase usually takes about 3 hours so much more than that would be a waste.
Move on and explore another zone!!! Good luck out there...
|
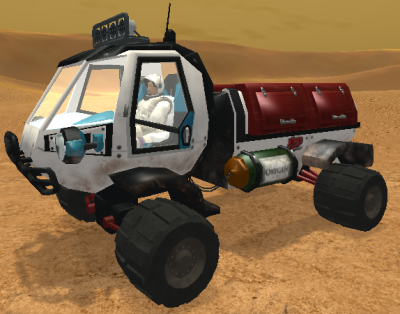
The Hercules Rover is made of carbon fiber, has 4 wheel electric drive and is powered by a Methane/Oxygen Fuel Cell. To interact with the rover select the rover with the mouse or U key.
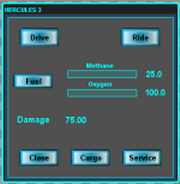
The main dialog will allow you to Drive, Ride, Store cargo or add Fuel. Drive and Ride should be obvious.
Fuel You can Fuel the Rover 2 ways. Park the rover near the Fuel Storage Station or use the oxygen and methane containers from the garage.
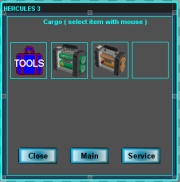
Cargo To add something to the cargo area select the cargo button. You will notice your hand item now says "LOAD". Click the button on the
hand item and it will be moved to the cargo area of the rover if there is room. The cargo only holds 4 items. To remove an item from the cargo just select it from
the cargo pane and if your hand slot is empty, the object will be moved to your hand.
Service The rover will suffer some wear or damage. To get a temporary repair use the tools at any location. To get a full repair you must
park the rover inside the garage and use the tools.
Driving the Rover Select the Drive button and you will get seated in the driver position. To EXIT press CTRL E or use the Exit button.
The Dash panel will pop up on your display. To Steer the rover by holding down the right mouse button and move left or right or you can use arrow keys.
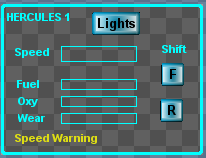
The F and R Buttons are the transmission for Forward and Reverse. Auto cruise is the NumLock key. To disengage the Auto Cruise hit the W key once.
You can move it around to a more comfortable position on the display. To see from behind the rover use the TAB key and you will get the 3rd person view.
The Rover uses fuel cells and batteries for power. If you leave the lights on you will burn up the power levels.
The game allows the user to advance in skill and rank. When you perform tasks you will at times get skill points. It takes 10 skill points to gain a level. When all the levels
are up by 1 you graduate from Cadet to Specialist. When all levels are 2 you become a Master. At 3 you are a Captain and 4 you become Commander.
There are 4 areas you can gain skill points. Engineering skill is used to assemble systems and repairs. Agriculture skill is used at the farm in phase 4 and up
Biology skill is used in phase 5 and up when you grow fish, algae, worms and mushrooms. Geology skill is used while mining or searching for minerals.
As your skills increase you get better at the task you are performing. You will probably become a Commander by running all three zones...
Cadet is where you start.
Specialist requires 10 skill points in each area
Master requires 20 skill points in each area
Captain requires 30 skill points in each area
Commander requires 40 skill points in each area
LAN Server (Local Area Network)
Launch the program using the "Start" button on the main menu. Now you are at the StartGame dialog, check the box Multiplayer and you can enter the game. Others will need to select the Join button at the Main Menu then Query LAN. Once the server is found they can select the Join button and enter the game.
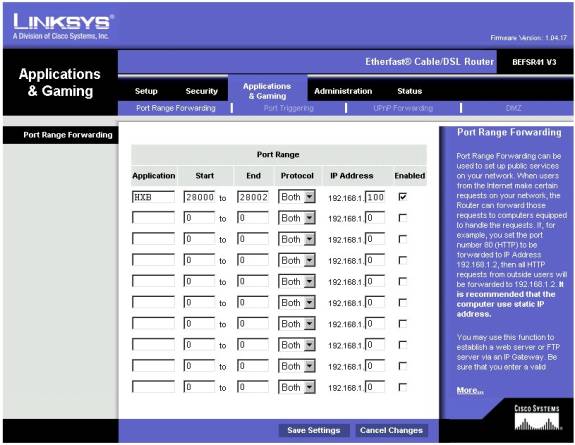
Internet-based Server Setup
To create a internet game server behind a router you must set up the router ports. To access your router, launch a web browser and go to 192.168.1.1
(or your router's configuration address) and you should get a login and password dialog.
Note that we are using a Linksys router for example. If you haven't changed the passwords you can usually get in by leaving the
login blank and set admin as the password. Go to the tab Application & Gaming and set up like this. Notice the IP Address has 192.168.1. [100]
you will have to check your computer's network card to get the value for your system.You can check this by opening a command line prompt and typing in "ipconfig".
Use this ip address as the port forward target.
Joining a game
The Server player will have to pass the external internet address and password to all the users via email, Ventrillo, Skype or what ever means you want.
You can use www.ipchicken.com if you don't know your internet address. When you receive this address you can
click on the Join button from the main menu and enter this IP address in the edit box. Then just select the Join By IP button to get into the game.
If you receive a message "Connection Timeout" then the server ports are not set up properly or are blocked. There is plenty of information on the internet
to help solve these issues.